
How to Set Up an Inexpensive Drip Irrigation System
March 18, 2026
If you’re watering garden beds, trees, or shrubs with a hose or sprinklers, you’re wasting time, water, and probably money.
A simple drip irrigation system can solve all of that in a single weekend for under $300.
This guide walks you through exactly how to set up a reliable, low-cost drip system that:
- Delivers water directly to plant roots
- Reduces water usage by up to 50%
- Prevents overwatering and runoff
- Runs automatically with a smart timer
And most importantly, we’ll show you how to avoid the most common failures that cause leaks, dead plants, and wasted time.
What Is a Drip Irrigation System?
A drip irrigation system slowly delivers water directly to the base of your plants through a network of tubing and emitters.
Instead of spraying water everywhere like sprinklers, drip systems:
- Target only the plants that need water
- Minimize evaporation
- Keep leaves dry, reducing disease
For homeowners, this is one of the easiest and highest ROI upgrades you can make to your yard.
Total Cost Breakdown ($100 to $300)
Here’s what a typical DIY setup costs:
- Drip tubing (50–100 ft): $20–$40
- Emitters: $15–$40
- Fittings and connectors: $15–$30
- Pressure regulator + filter: $20–$40
- Smart hose timer: $70–$120
- Optional leak sensor: $150-$250
- You can build a solid system for around $150–$250 total.
Tools and Materials You’ll Need
- 1/2 inch mainline tubing
- 1/4 inch distribution tubing
- Drip emitters (1 GPH or 2 GPH)
- Barbed connectors and tees
- End caps or flush valves
- Hole punch tool
- Pressure regulator and filter
- Hose bib adapter
- Smart timer (highly recommended)
Step 1: Plan out your system
Before you buy anything, sketch your layout.
Mark:
- Garden beds
- Trees and shrubs
- Hose connection point
- Approximate tubing paths
Most DIY systems fail because people just start laying tubing without a plan.
A simple map helps you:
- Avoid wasted materials
- Place emitters correctly
- Expand later without rework
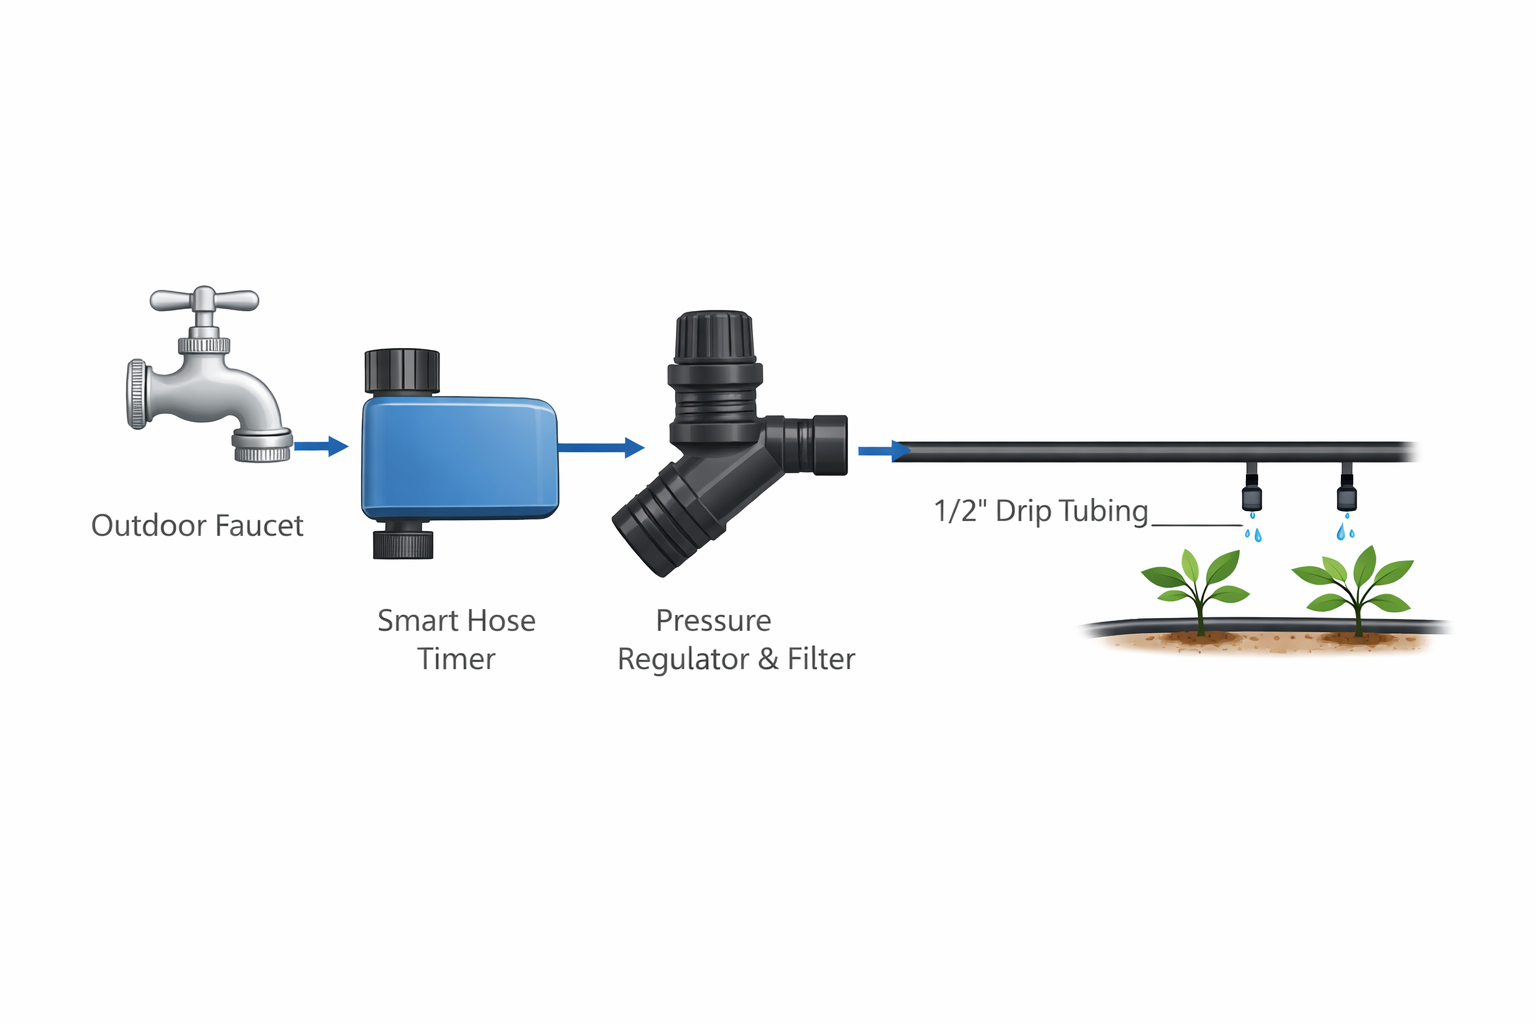
Step 2: Install Your Water Source Connection
Connect your system to a hose bib in this order:
- Filter
- Pressure regulator (critical for drip systems)
- Smart timer
- Mainline tubing
This setup ensures:
- Clean water
- Proper pressure (usually ~25 PSI)
- Automated watering
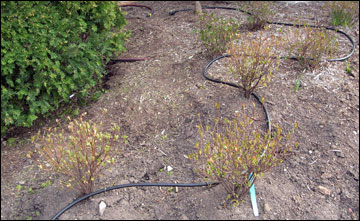
Step 3: Run the Mainline Tubing
Lay your 1/2 inch tubing along the edges of your garden beds.
Tips:
- Keep lines simple and clean
- Use stakes to secure tubing
- Avoid sharp bends or kinks
- Run close to plant clusters
This is your backbone. Everything else connects to it.
Step 4: Add Emitters for Each Plant
Punch holes into the mainline and insert emitters or 1/4 inch tubing.
General rules:
- Small plants: 1 emitter
- Shrubs: 2 emitters
- Trees: 3 to 5 emitters spaced around root zone
Spacing matters more than people think. Poor placement leads to:
- Dry roots
- Uneven growth
- Water waste
Step 5: Install a Smart Timer (This Is a Must)
A manual system works. But it’s a pain and you’ll forget to adjust it.
A smart timer like the Rachio Smart Hose Timer lets you:
- Automate watering schedules
- Adjust based on weather
- Control everything from your phone
This alone is what turns drip irrigation from “nice idea” into something that actually sticks long term.
Step 6: Flush and Test the System
Before sealing the ends:
- Turn the system on
- Let water run through the lines
- Flush out debris
- Check every emitter
Then cap the lines and run a full cycle.
The Biggest Mistake Homeowners Make (And How to Avoid It)
Every drip system eventually develops problems.
Common issues:
- Emitters pop off
- Lines get cut or chewed
- Filters get clogged
- Connections loosen
- Slow leaks go unnoticed
The problem is not installation.
The problem is you don’t know when something breaks.
Why Every Drip Line Should Have a Sensor
If you’re serious about reliability, every drip system should include a sensor.
A simple pressure or flow sensor can:
- Detect leaks immediately
- Alert you when emitters fail
- Identify clogged filters
- Prevent water waste and plant damage
Without a sensor, you’re guessing.
With a sensor, you know exactly what’s happening.
This is the difference between:
- A system you install once and forget
- And a system that quietly fails over time
Maintenance Tips (5 Minutes Per Month)
To keep your system running:
- Check emitters monthly
- Flush lines every few months
- Look for wet spots or dry patches
- Adjust watering seasonally
With a smart timer and sensor, most of this becomes proactive instead of reactive.
Final Thoughts
A drip irrigation system is one of the simplest upgrades you can make to your yard.
For under $300 and a few hours of work, you get:
- Healthier plants
- Lower water bills
- Less manual work
- A system that runs itself
If you build it right and monitor it, it will save you time, money, and frustration for years.